Supabase Auth with Convex: Frictionless Login for Modern Apps
How we integrated Supabase Auth with Convex for LucaLuca.ai, our AI-powered pet photo app built with Expo.
8 min read
- Convex
- Supabase
- Authentication
- Expo
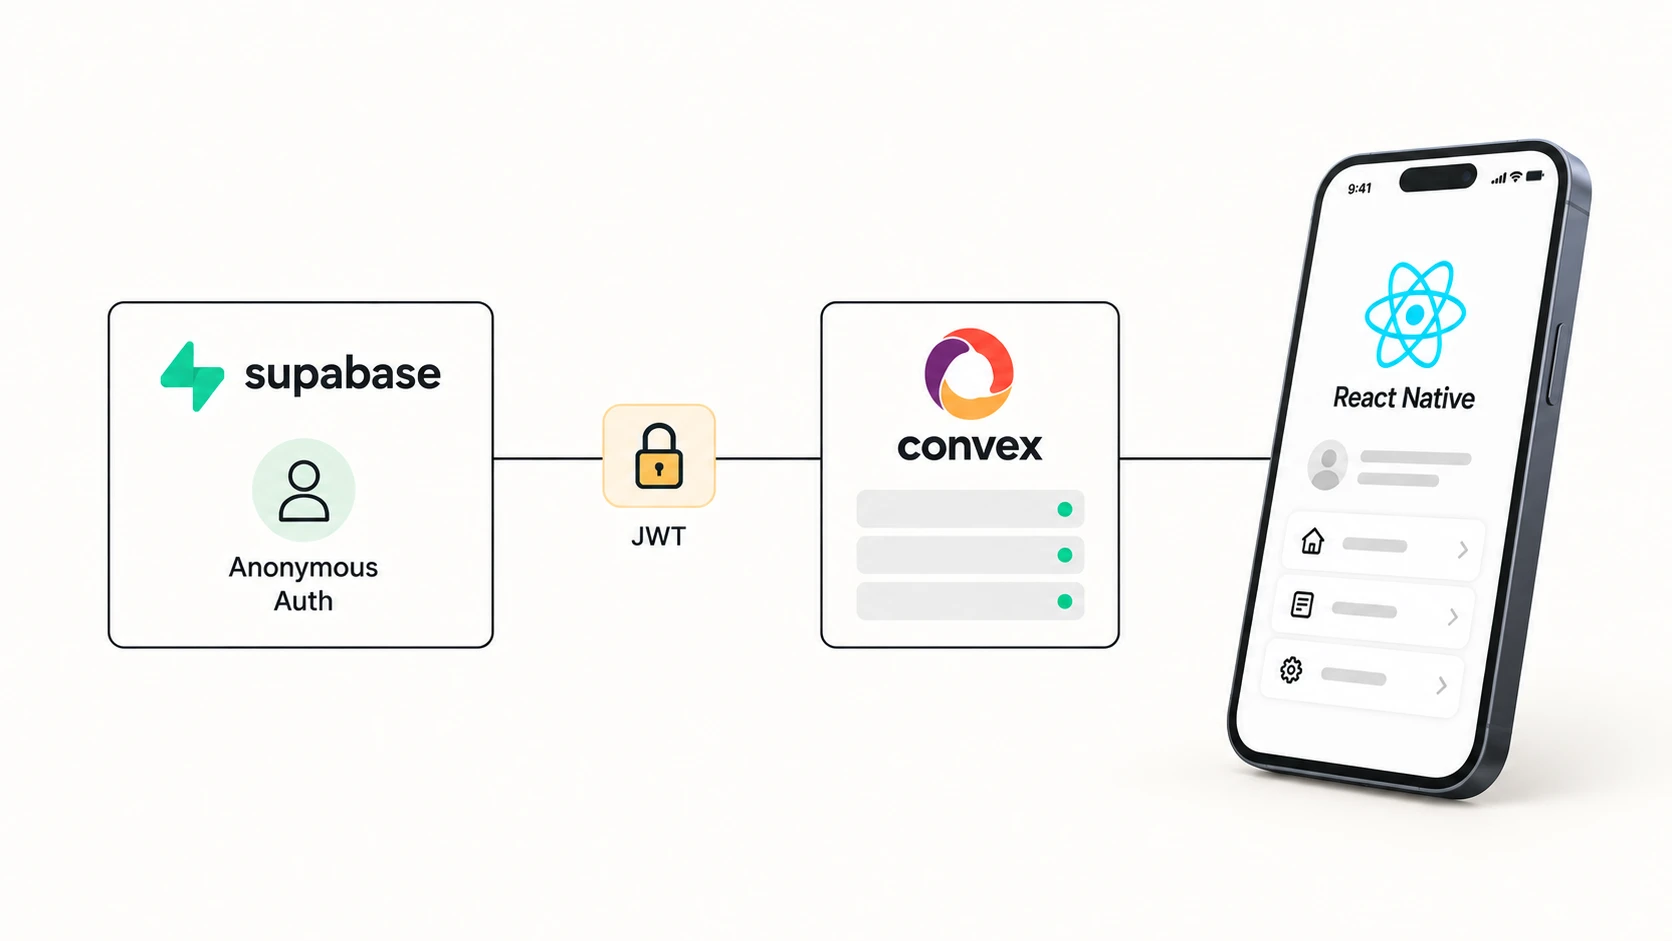
This guide is based on our experience building LucaLuca—a mobile app where people mostly just want to see their pets turned into ridiculous AI art. Under the hood, we use Convex as our backend and Supabase Auth for frictionless, anonymous sign-ins.
If you're building a modern app with Convex and care about minimizing onboarding friction, I’ll walk you through how we integrated Supabase authentication, what worked, and what trade-offs to be aware of.
This post assumes you’re comfortable with React, TypeScript, and the basics of auth—we’ll focus on the parts that are specific to mobile and frictionless onboarding.
Why Convex?
We picked Convex because it removes an entire category of backend busywork. You write everything in TypeScript—schema, queries, mutations, actions—and it all just fits together. No glue code, no drifting types, no “wait, why is this out of sync?” moments.
Real-time updates come for free. There’s no manual WebSocket setup, no cache invalidation strategy to debate on Slack, and no second system to keep in your head. For a small team (or a team of one), that focus is hard to overstate. Convex lets you spend your time building features instead of infrastructure.
Convex also supports several authentication providers out of the box, including Clerk and Auth0. They’re solid products. But when we started building LucaLuca, our requirements—especially around anonymous sign-ins for a mobile-first onboarding flow—pushed us toward Supabase instead.
Why Supabase Over Other Auth Providers?
When evaluating authentication providers for LucaLuca, anonymous sign-ins were a hard requirement—a feature that turned out to be surprisingly rare among popular auth providers.
The Case for Anonymous Sign-ins
Every extra onboarding step costs attention—and attention is scarce on mobile. Anonymous sign-ins remove the biggest hurdle: account creation. Users can open the app and immediately start turning their pet photos into AI art. Once they’re hooked (and yes, seeing your cat as a DJ helps), converting to a permanent account feels natural, not forced.
The problem? At the time we built LucaLuca in late 2025, neither Clerk nor Auth0 offered first-class anonymous sign-ins suitable for our mobile onboarding flow. These are excellent providers with great developer experiences, but for our mobile app, this was a dealbreaker.
Supabase Auth, on the other hand, offers anonymous sign-ins as a first-class feature. And it's included in their generous free tier.
Other Supabase Advantages
Beyond anonymous auth, Supabase brought several benefits:
- Generous free tier: Perfect for indie developers and startups validating ideas
- Clean dashboard UI: Managing users, viewing auth logs, and configuring settings is straightforward
- Solid documentation: The auth docs are comprehensive and well-maintained
- Convert anonymous to permanent users: When users are ready to commit, the conversion is seamless—their user ID stays the same, so all their data carries over
The Trade-offs to Consider
No solution is perfect. With Supabase's free tier, anonymous sessions expire after 30 days of inactivity, meaning users get a new ID if they haven't used the app within that window. For an app like LucaLuca, this was acceptable—active users stay authenticated, and inactive users starting fresh isn't a significant issue.
If this is a concern for your use case, you have options:
- Upgrade to Supabase Pro to extend session duration
- Implement a device token system to migrate data between anonymous user IDs if needed
The Integration: Surprisingly Simple
At a high level, the setup boils down to: Supabase issues JWTs, Convex verifies them, and the client just passes tokens between the two.
Understanding Supabase's JWT Signing Keys
Supabase recently introduced a new JWT signing keys system based on public key cryptography. This replaced the legacy system that used a shared JWT secret, bringing several improvements:
- Asymmetric signing with ES256: The public key can be shared safely (via JWKS endpoint) while the private key stays secure
- JWKS endpoint exposure: Each Supabase project exposes its public keys at
/.well-known/jwks.json - Better security posture: External services (like Convex) can verify tokens without needing access to secrets
This is what makes the Convex integration so clean—Convex simply fetches the public key from Supabase's JWKS endpoint to verify incoming JWTs. No shared secrets, no manual key rotation headaches.
Step 1: Configure Convex Auth
Create or update your convex/auth.config.ts file with your Supabase project details:
import { AuthConfig } from "convex/server";

export default {
  providers: [
    {
      type: 'customJwt',
      issuer: 'https://YOUR_PROJECT_REF.supabase.co/auth/v1',
      jwks: 'https://YOUR_PROJECT_REF.supabase.co/auth/v1/.well-known/jwks.json',
      algorithm: 'ES256',
    },
  ],
} satisfies AuthConfig;
Replace YOUR_PROJECT_REF with your actual Supabase project reference (found in your Supabase dashboard URL or project settings).
A few things to note:
- The
issuermust exactly match theissclaim in JWTs that Supabase generates - The
jwksURL is where Convex fetches the public keys to verify token signatures ES256(ECDSA with P-256 curve) is Supabase's recommended asymmetric algorithm
Important: After updating this file, run npx convex dev (for development) or npx convex deploy (for production) to sync the configuration to your Convex backend.
Step 2: Use Auth in Your Convex Functions
Once configured, you can access the authenticated user in your Convex functions:
import { getAuthUserId } from '@convex-dev/auth/server';

export const generateImage = action({
  handler: async (ctx, args) => {
    const userId = await getAuthUserId(ctx);

    if (!userId) {
      throw new Error('Authentication required');
    }

    // Your logic here, with access to the authenticated user
  }
});
The getAuthUserId function returns the user's sub claim from the JWT—which is the Supabase user ID. This stays consistent even when an anonymous user converts to a permanent account.
Step 3: Client-Side Setup (React Native / Expo)
LucaLuca is built with Expo, so here's how we wired up Supabase and Convex on the client side.
The key insight is understanding the roles each service plays: Supabase issues JWTs, Convex verifies JWTs, and your client code is simply the bridge that passes tokens from one to the other. This means the integration can be surprisingly minimal.
Here's the complete provider that handles everything—Supabase client setup, auth state management, and the Convex bridge:
// lib/ConvexProvider.tsx
import { ConvexProviderWithAuth, ConvexReactClient } from "convex/react";
import { createClient, Session } from "@supabase/supabase-js";
import { useEffect, useMemo, useState } from "react";

const supabase = createClient(
  process.env.EXPO_PUBLIC_SUPABASE_URL!,
  process.env.EXPO_PUBLIC_SUPABASE_ANON_KEY!,
  {
    auth: {
      autoRefreshToken: true,
      persistSession: true,
      detectSessionInUrl: false, // React Native has no URL-based auth redirects
    },
  }
);

const convex = new ConvexReactClient(process.env.EXPO_PUBLIC_CONVEX_URL!);

type ConvexCustomAuth = Parameters<typeof ConvexProviderWithAuth>[0]['useAuth'];

const useSupabaseAuth: ConvexCustomAuth = () => {
  const [session, setSession] = useState<Session | null>(null);
  const [isLoading, setIsLoading] = useState(true);

  useEffect(() => {
    supabase.auth.getSession().then(({ data }) => {
      setSession(data.session);
      setIsLoading(false);
    });

    const { data: subscription } = supabase.auth.onAuthStateChange(
      (_event, newSession) => setSession(newSession)
    );

    return () => subscription.subscription.unsubscribe();
  }, []);

  return useMemo(
    () => ({
      isLoading,
      isAuthenticated: !!session,
      fetchAccessToken: async ({ forceRefreshToken }: { forceRefreshToken: boolean }) => {
        if (forceRefreshToken) {
          const { data } = await supabase.auth.refreshSession();
          return data.session?.access_token ?? null;
        }
        return session?.access_token ?? null;
      },
    }),
    [session, isLoading]
  );
};

export function ConvexProvider({ children }: { children: React.ReactNode }) {
  return (
    <ConvexProviderWithAuth client={convex} useAuth={useSupabaseAuth}>
      {children}
    </ConvexProviderWithAuth>
  );
}
Then wrap your app with it:
// app/_layout.tsx
import { ConvexProvider } from "@/lib/ConvexProvider";

export default function RootLayout() {
  return (
    <ConvexProvider>
      {/* Your app content */}
    </ConvexProvider>
  );
}
That's it for the client side. The onAuthStateChange subscription handles sign-ins, sign-outs, and automatic token refreshes. When Convex needs a token, it calls fetchAccessToken—we return the cached token directly, only hitting Supabase's refreshSession() when explicitly requested.
To actually sign users in anonymously, call signInAnonymously() somewhere early in your app—typically after the splash screen or when the user first lands on a screen that requires authentication:
useEffect(() => {
  const ensureSignedIn = async () => {
    const { data: { session } } = await supabase.auth.getSession();
    if (!session) {
      await supabase.auth.signInAnonymously();
    }
  };
  ensureSignedIn();
}, []);
This should typically run once per app install; Supabase will persist the session automatically.
When signInAnonymously() is called, Supabase creates a new user in your auth.users table, issues a JWT, and persists the session locally. From that point on, the user is fully authenticated—they just don't have an email or OAuth identity attached yet. The onAuthStateChange listener in our provider picks up the new session automatically, and Convex starts receiving valid tokens.
Note: If you're building for web instead of React Native, remove
detectSessionInUrl: falseso OAuth redirects work correctly. For apps with stricter security requirements, you can swap Supabase's default AsyncStorage forexpo-secure-storeto use the iOS Keychain / Android Keystore.
Advanced: Multiple Supabase Projects
For LucaLuca, we actually use two separate Supabase projects—one for regular app users and one for admin users. Both connect to the same Convex deployment. Here's how that configuration looks:
// convex/auth.config.ts
export default {
  providers: [
    // App Users
    {
      type: 'customJwt',
      issuer: 'https://YOUR_APP_PROJECT.supabase.co/auth/v1',
      jwks: 'https://YOUR_APP_PROJECT.supabase.co/auth/v1/.well-known/jwks.json',
      algorithm: 'ES256',
    },
    // Admin Users
    {
      type: 'customJwt',
      issuer: 'https://YOUR_ADMIN_PROJECT.supabase.co/auth/v1',
      jwks: 'https://YOUR_ADMIN_PROJECT.supabase.co/auth/v1/.well-known/jwks.json',
      algorithm: 'ES256',
    },
  ],
};
Convex will try each provider in order when validating a JWT. The issuer field ensures tokens are routed to the correct provider for verification.
Differentiating Admin Users
To protect admin endpoints, we created a helper function that verifies the user is from our admin Supabase project:
// convex/auth.ts
import { Auth } from 'convex/server';

export const authorizeAdminUser = async (ctx: { auth: Auth }) => {
  const user = await ctx.auth.getUserIdentity();

  if (!user) {
    throw new Error('Authentication required');
  }

  // Check if the issuer matches our admin Supabase project
  if (user.issuer !== 'https://YOUR_ADMIN_PROJECT.supabase.co/auth/v1') {
    throw new Error('User not authorized');
  }

  return user;
};
Then in your admin-only functions:
export const adminOnlyAction = action({
  handler: async (ctx) => {
    const adminUser = await authorizeAdminUser(ctx);
    // Proceed with admin logic
  }
});
Documentation Gap
One thing worth mentioning: the Convex documentation doesn't yet explicitly cover Supabase as an auth provider. The customJwt provider documentation exists, but finding the right combination of settings for Supabase required some experimentation and diving into JWT specs. Hopefully, this guide fills that gap.
Wrapping Up
The Supabase + Convex combination has worked exceptionally well for LucaLuca. We get:
- Frictionless onboarding with anonymous sign-ins
- A cost-effective auth solution with Supabase's free tier
- Real-time, type-safe backend with Convex
- Clean separation between app and admin users
If you're building a mobile app (or any app) where reducing onboarding friction matters, and you want the developer experience of Convex without being locked into Clerk or Auth0, give this combination a try.
Resources
- LucaLuca - The AI pet photo app we built with this stack
- Convex Custom JWT Provider Docs
- Supabase JWT Signing Keys
- Supabase Anonymous Sign-ins
- Converting Anonymous Users to Permanent Users